Difference between revisions of "Installing Qlikview Server x64"
>Jeremyb (→Installing QlikView Server 11.2 sr3 x64 on the Vital Signs' Windows server) |
>Kevint |
||
| (12 intermediate revisions by 3 users not shown) | |||
| Line 1: | Line 1: | ||
==Installing QlikView 11 Server for Vital Signs== | ==Installing QlikView 11 Server for Vital Signs== | ||
| − | + | '''''All of the installation information and links provided here were believed to be accurate at the time of writing. Screen shots and file names are version specific and will likely be different for your site specific installation. This information is provided as a courtesy and is not warranted in any way. Vital Soft is NOT RESPONSIBLE for software installed on your server.''''' | |
| + | * [https://www.vital-soft.com/download/secure/vitalsigns/qlikview/QV11.20r20/Server/QlikViewServer_Win2012andUp.exe Download QlikView Server 11.20 SR20 for Win2012 and Up] | ||
| + | * [https://www.vital-soft.com/download/secure/vitalsigns/qlikview/QV11.20r11/Server/QlikViewServer_x64Setup.exe Download QlikView Server 11.20 SR11 for x64] | ||
| + | * [https://www.vital-soft.com/download/secure/vitalsigns/qlikview/QV11.20r11/Server/QlikViewServer_x86Setup.exe Download QlikView Server 11.20 SR11 for x86 (32 bit)] | ||
| + | |||
| + | * [https://www.vital-soft.com/download/secure/vitalsigns/qlikview/QV12/QlikViewServer_x64Setup.exe Download QlikView Server 12.1 SR2 for x64] | ||
Run the setup on the Windows server hosting Vital Signs | Run the setup on the Windows server hosting Vital Signs | ||
| + | |||
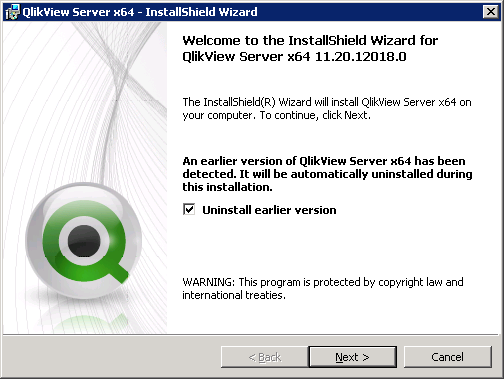
| + | If you are upgrading from QlikView Server 9 you will see the following uninstall prompt | ||
| + | |||
| + | [[File:Qlik11 server install1.png]] | ||
| + | |||
| + | |||
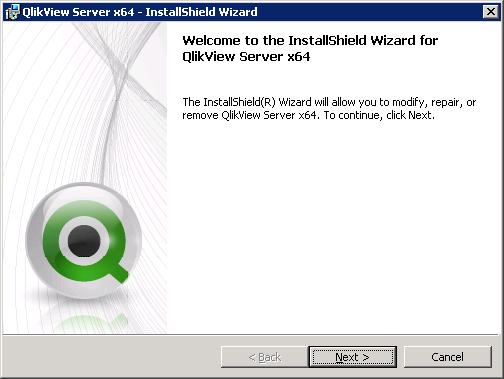
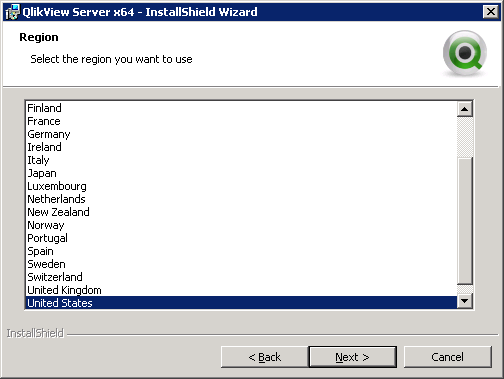
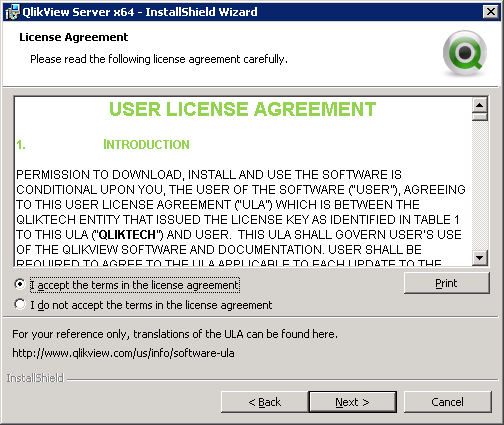
| + | Click Next to begin the installation wizard | ||
| + | |||
| + | [[File:Qlik11 server install2.png]] | ||
| + | |||
| + | [[File:Qlik11 server install3.png]] | ||
| + | |||
| + | [[File:Qlik11 server install4.png]] | ||
| + | |||
| + | [[File:Qlik11 server install5.png]] | ||
| + | |||
| + | [[File:Qlik11 server install6.png]] | ||
| + | |||
| + | [[File:Qlik11 server install7.png]] | ||
| + | |||
| + | |||
| + | Enter the domain\user information for the vitalsigns administrator that you are logged in as | ||
| + | |||
| + | [[File:Qlik11 server install8.png]] | ||
| + | |||
| + | |||
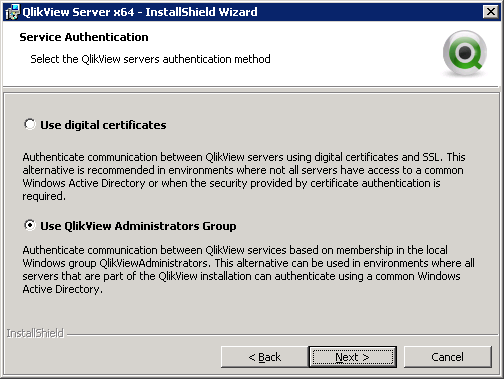
| + | Select the QlikView Administrators Group for Service Authentication | ||
| + | |||
| + | [[File:Qlik11 server install9.png]] | ||
| + | |||
| + | [[File:Qlik11 server install10.png]] | ||
| + | |||
| + | |||
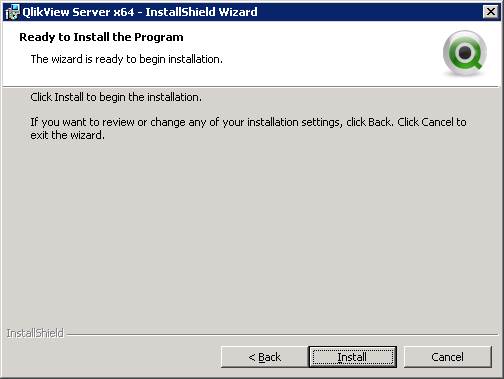
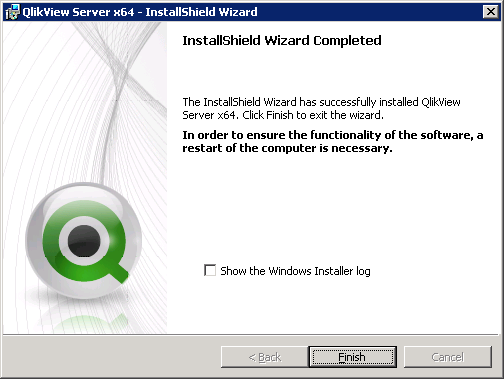
| + | Once the install is complete you may restart the server. If you are upgrading a production system and are unable to reboot see the next set of instructions | ||
| + | |||
| + | [[File:Qlik11 server install11.png]] | ||
| + | |||
| + | |||
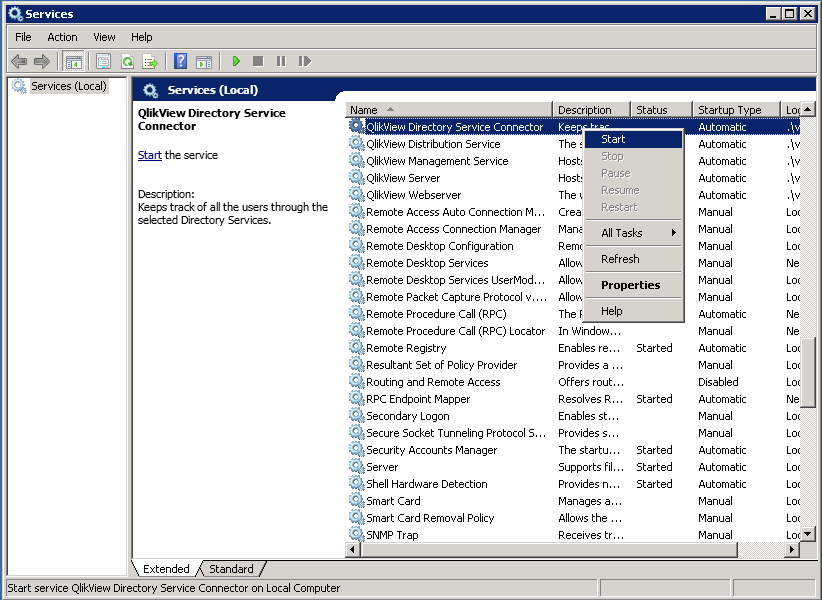
| + | To manually start the services, open services.msc | ||
| + | |||
| + | Sort by Name | ||
| + | |||
| + | Right click and Start the QlikView services from top to bottom | ||
| + | |||
| + | [[File:Qlik11 server install12.PNG]] | ||
| + | |||
| + | [[File:Qlik11 server install13.png]] | ||
| + | |||
| + | ==Apply the Server License== | ||
| + | |||
| + | Open QlikView->Server Management Console from the Start menu | ||
| + | |||
| + | Select the System tab | ||
| + | |||
| + | Click the Licenses Sub menu link | ||
| + | |||
| + | Select the QlikView Server Type | ||
| + | |||
| + | Click the QlikView Server License tab | ||
| + | |||
| + | Enter the Serial number and Control number provided by Vital Soft | ||
| + | |||
| + | [[File:Qlik11 server install15.png]] | ||
| + | |||
| + | [[File:Qlik11 server install16.png]] | ||
| + | |||
| + | |||
| + | ==Configure the Server== | ||
| + | |||
| + | Select the System Tab | ||
| + | |||
| + | Select Setup | ||
| + | |||
| + | Select the + QlikView Servers and select the QVS@.... Server | ||
| + | |||
| + | Select the Folders tab | ||
| + | |||
| + | Set the Root Folder path to c:\vitalsigns\YOURCU | ||
| + | |||
| + | [[File:Qlik11 server install17.png]] | ||
| + | |||
| + | |||
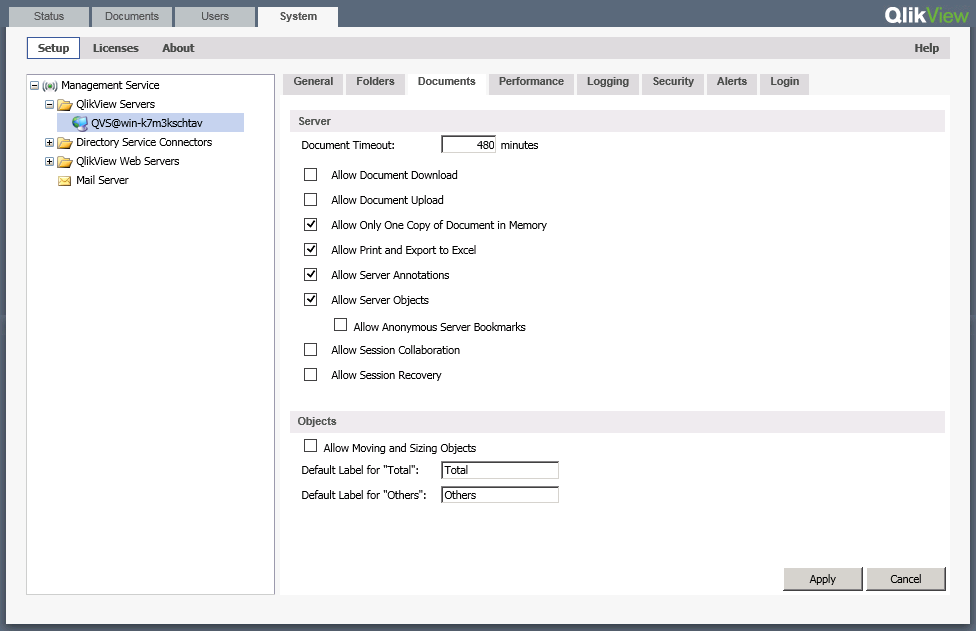
| + | Select the Documents tab | ||
| + | |||
| + | Verify the following options are checked/unchecked | ||
| + | |||
| + | [[File:Qlik11 server install18.png]] | ||
| + | |||
| + | |||
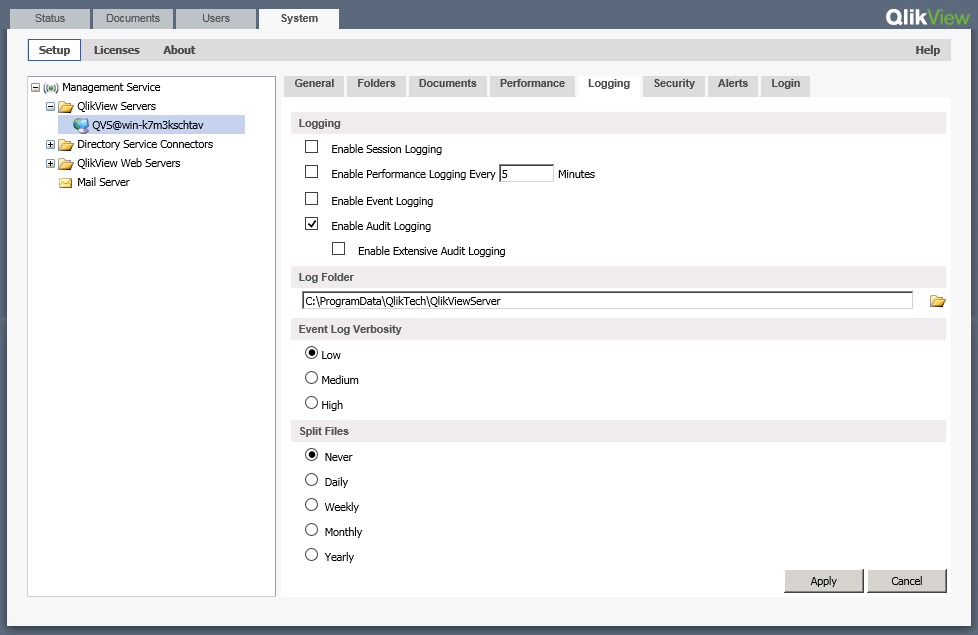
| + | Select the Logging Tab | ||
| + | |||
| + | Enable the appropriate logging for QlikView | ||
| + | |||
| + | Auditing is recommended | ||
| + | |||
| + | [[File:Qlik11 server install19.PNG]] | ||
| + | |||
| + | |||
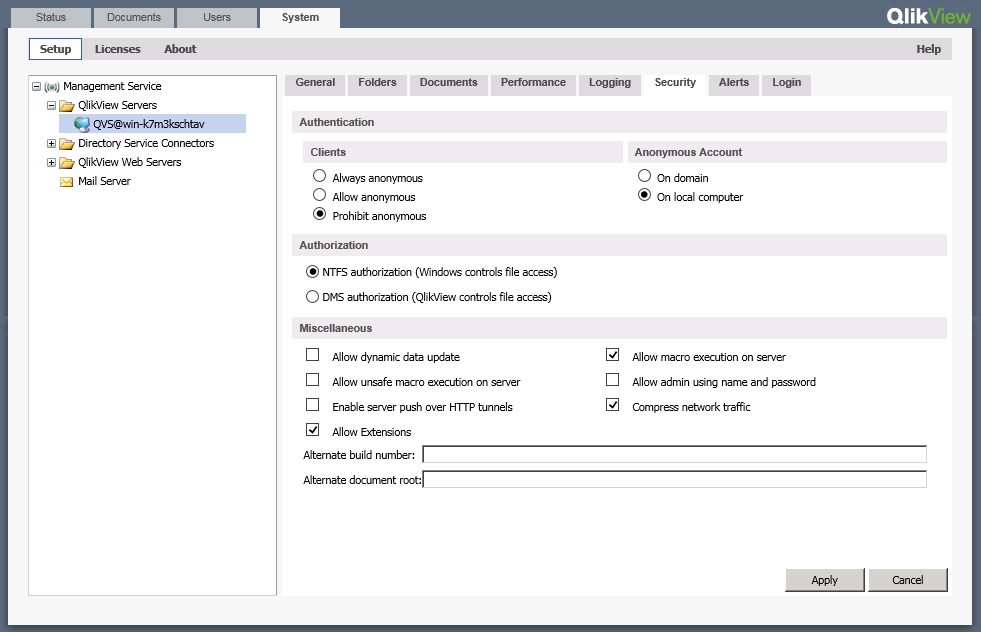
| + | Select the Security Tab | ||
| + | |||
| + | Confirm the following options are selected, checked/unchecked | ||
| + | |||
| + | [[File:Qlik11 server install20.PNG]] | ||
| + | |||
| + | |||
| + | Click Apply to apply the server configuration | ||
Latest revision as of 13:23, 19 May 2020
Installing QlikView 11 Server for Vital Signs
All of the installation information and links provided here were believed to be accurate at the time of writing. Screen shots and file names are version specific and will likely be different for your site specific installation. This information is provided as a courtesy and is not warranted in any way. Vital Soft is NOT RESPONSIBLE for software installed on your server.
- Download QlikView Server 11.20 SR20 for Win2012 and Up
- Download QlikView Server 11.20 SR11 for x64
- Download QlikView Server 11.20 SR11 for x86 (32 bit)
Run the setup on the Windows server hosting Vital Signs
If you are upgrading from QlikView Server 9 you will see the following uninstall prompt
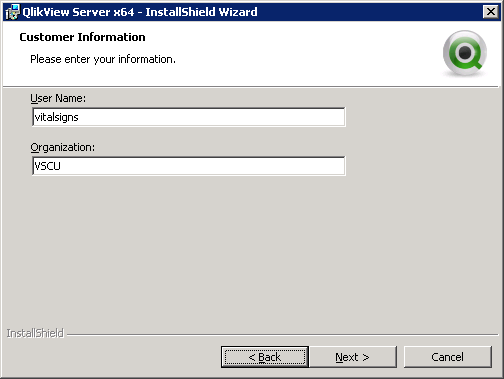
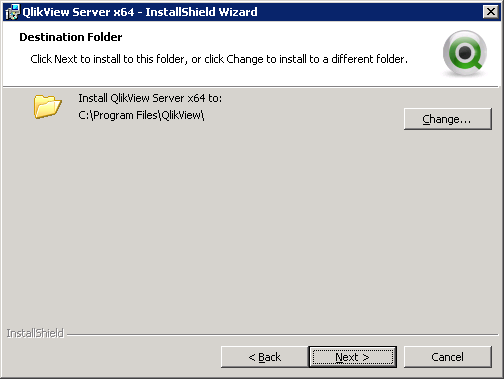
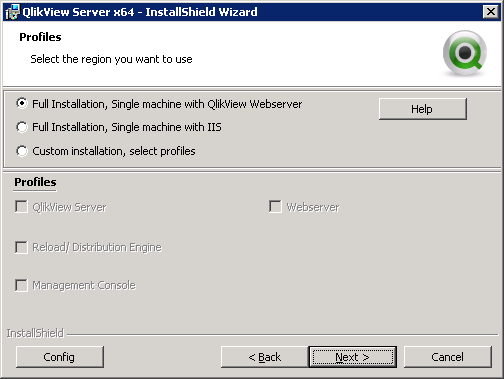
Click Next to begin the installation wizard
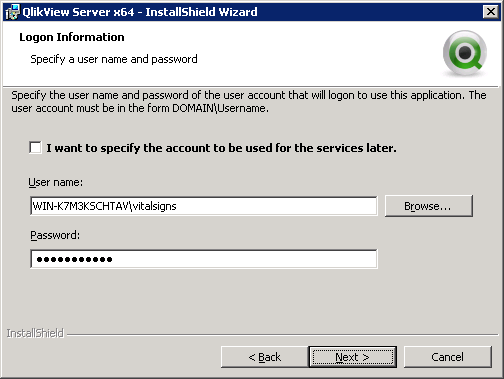
Enter the domain\user information for the vitalsigns administrator that you are logged in as
Select the QlikView Administrators Group for Service Authentication
Once the install is complete you may restart the server. If you are upgrading a production system and are unable to reboot see the next set of instructions
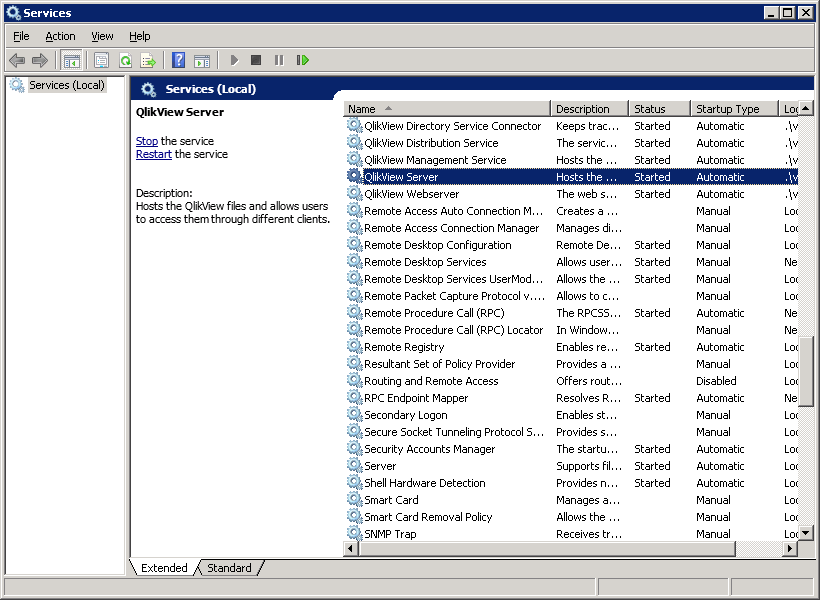
To manually start the services, open services.msc
Sort by Name
Right click and Start the QlikView services from top to bottom
Apply the Server License
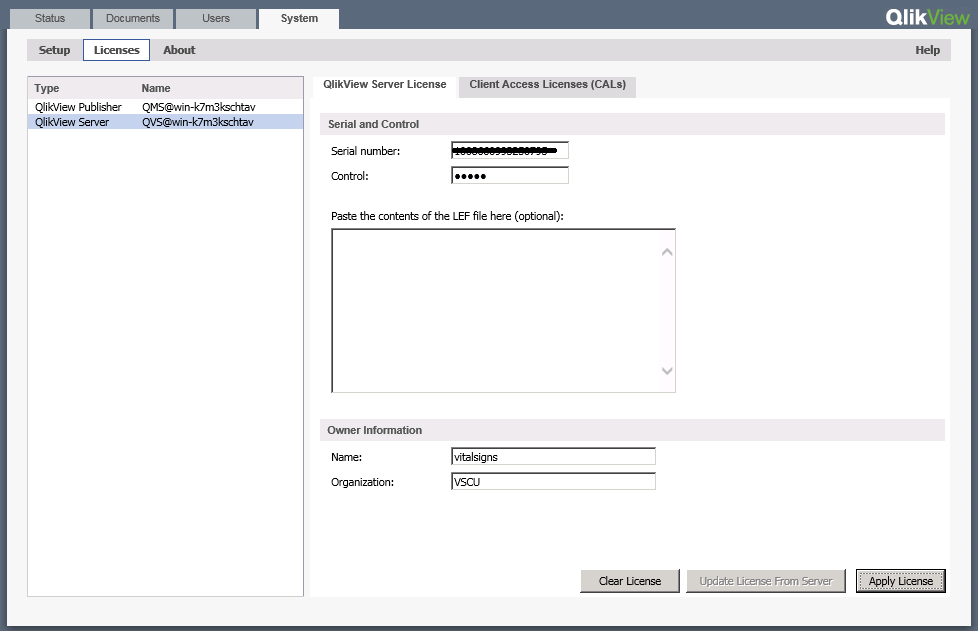
Open QlikView->Server Management Console from the Start menu
Select the System tab
Click the Licenses Sub menu link
Select the QlikView Server Type
Click the QlikView Server License tab
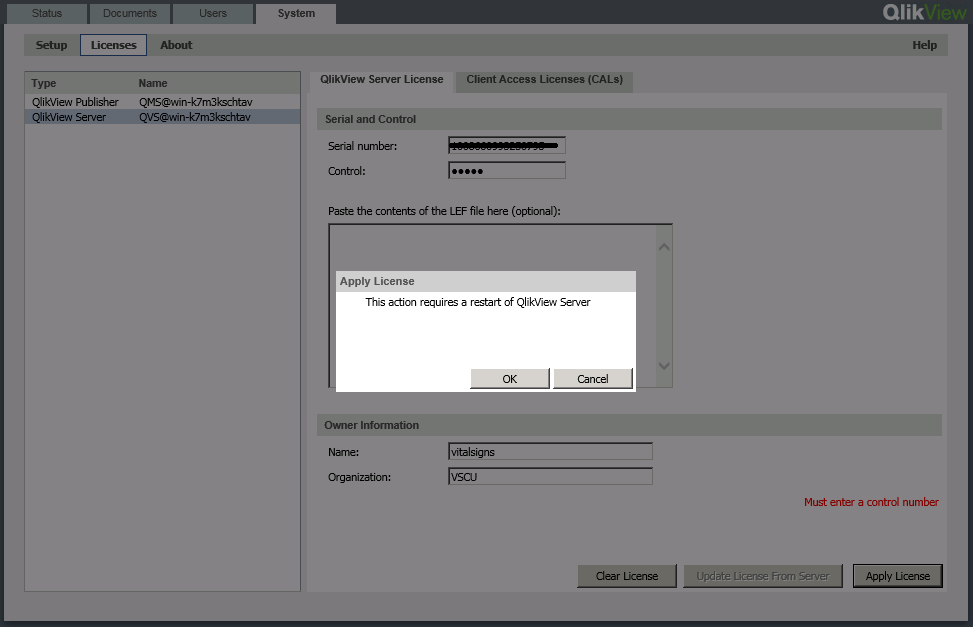
Enter the Serial number and Control number provided by Vital Soft
Configure the Server
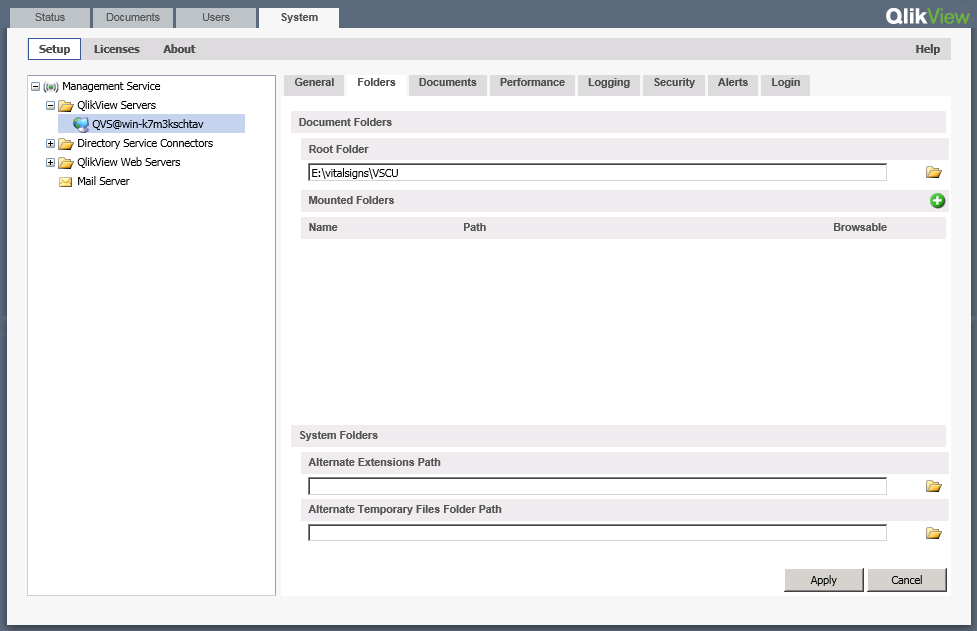
Select the System Tab
Select Setup
Select the + QlikView Servers and select the QVS@.... Server
Select the Folders tab
Set the Root Folder path to c:\vitalsigns\YOURCU
Select the Documents tab
Verify the following options are checked/unchecked
Select the Logging Tab
Enable the appropriate logging for QlikView
Auditing is recommended
Select the Security Tab
Confirm the following options are selected, checked/unchecked
Click Apply to apply the server configuration
