Installing Vital Signs on Windows
Contents
Windows Server Prep Checklist
- Created vitalsigns local or domain administrator user
- Created vsftp local user for ftp transfers
- Installed IIS for standard FTP
- Installed .net framework 4.0
Downloading Vital Signs
Login to the Windows server as the vitalsigns administrator user
Download Vital Signs 1.7 Windows
Installing Vital Signs
Login to the Windows server as vitalsigns
Create a directory named vitalsigns on the large drive where Vital Signs will be installed
Unzip the VSIGNS-Windows-1706.zip contents into the vitalsigns directory
Rename the CU1 folder to the CU acronym IE: YOURCU
Create a user named vitalsignsftp that will be used to transfer files via ftp from the HPUX host
Browse into YOURCU and change permissions on the data folder
- Remove local users and domain users from any access
- Specifically allow vitalsigns and the vitalsigns ftp user full access
Configuring Vital Signs Listener
Browse to vitalsigns\YOURCU\data\config
Copy vsigns_srv-samp.ini to vsigns_srv.ini
Copy start_vsigns_srv-samp.vbs to start_vsigns_srv.vbs
Edit vsigns_srv.ini and modify the VS_PATH to your vitalsigns\YOURCU path
Confirm QV_UNICODE is set to "UTF-16LE"
Example vsigns_srv.ini
 VS_PATH      "E:\vitalsigns\VSCU"
 VS_PORT      30601
 VS_LOG       "vsigns_srv.log"
 QV_PATH      "c:\program files\qlikview"
 QV_NAME      "qv.exe"
 CLEANUP      "archive"
 LOG_ARCHIVE_DAYS          20
 ASD_ARCHIVE_DAYS          30
 QV_UNICODE   "UTF-16LE"
Edit start_vsigns_srv.vbs and change the paths appropriately
Example start_vsigns_srv.vbs
 Dim oShell
 Set oShell = CreateObject ("WScript.shell")
 oShell.run "cmd /K C:\Python27\python E:\vitalsigns\bin\vsigns_srv.py E:\vitalsigns\VSCU\data\config\vsigns_srv.ini > E:\vitalsigns\VSCU\data\config\vsigns_srv.log"
 Set oShell = Nothing
Double click start_vsigns_srv.vbs to start the listener in the foreground for verification
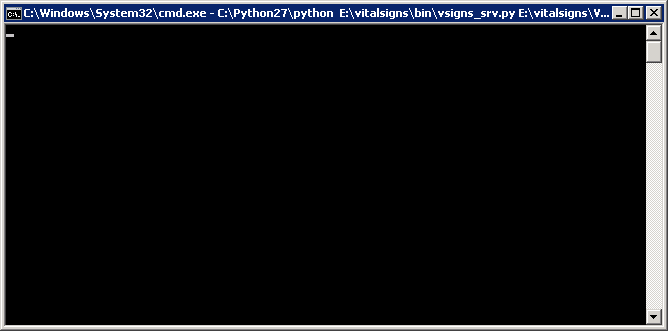
There should be just an underscore with a black background if this was successful Close out of the Command prompt window if it was successful
Setup Listener to start at boot
Login as the vitalsigns user
Open taskschd.msc
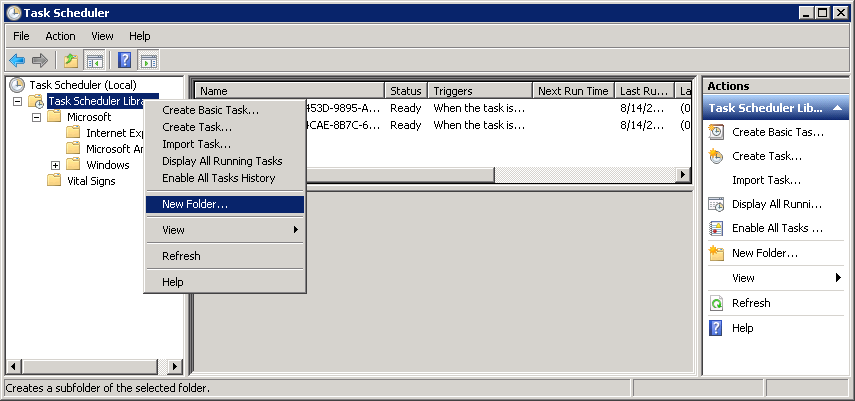
Right click Task Scheduler Library and click New Folder
Name the Folder Vital Signs
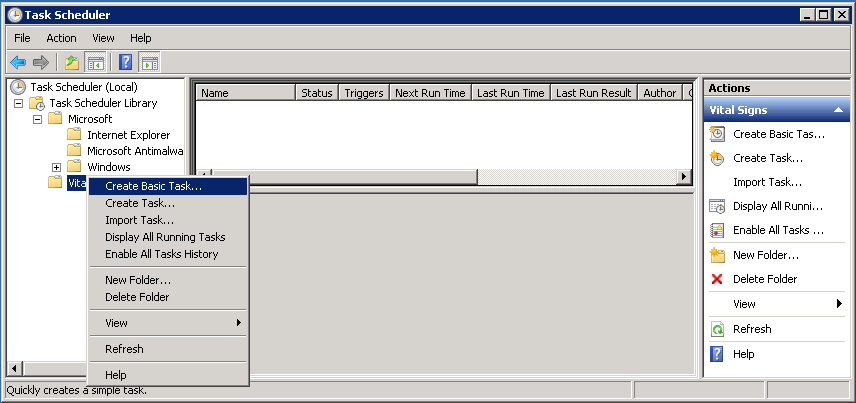
Right click the Vital Signs folder and select Create Basic Task
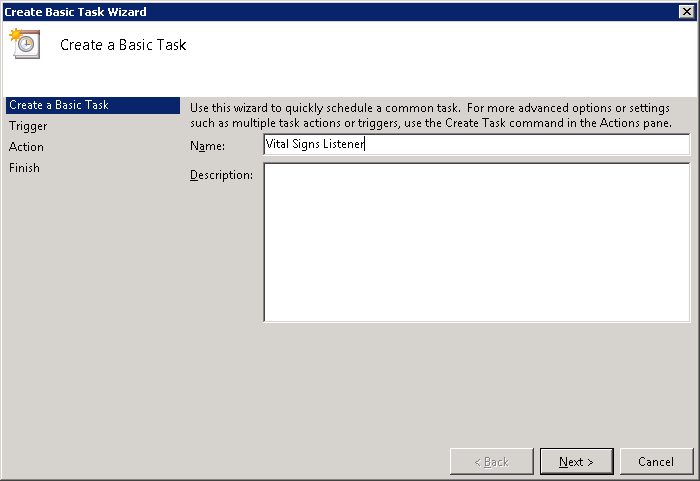
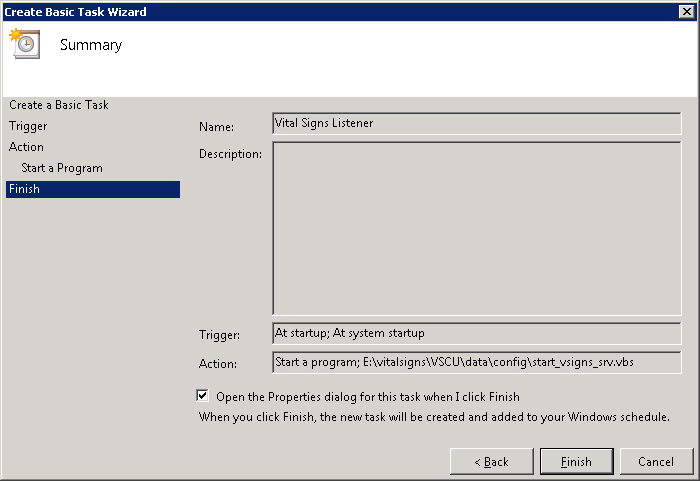
Enter Vital Signs Listener for the name and click Next
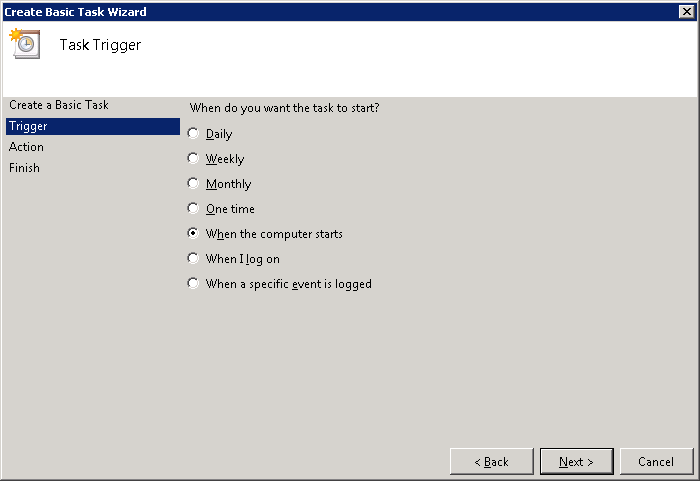
Select When the computer starts and click Next
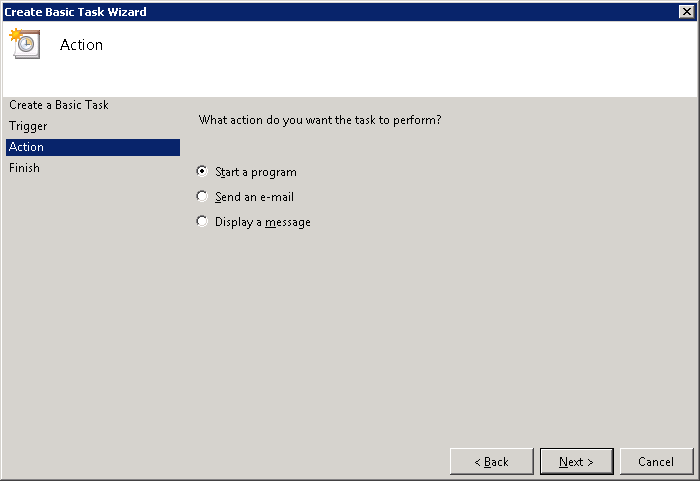
Select Start a program and click Next
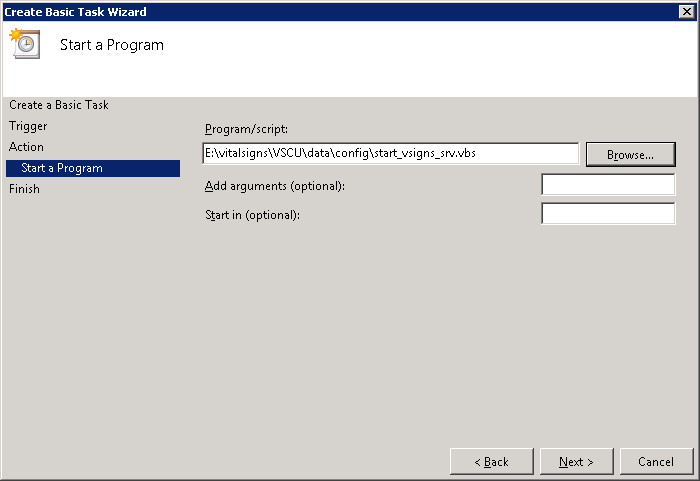
Browse to start_visigns_srv.vbs and click Next
Check the Open the Properties dialog... and click Finish
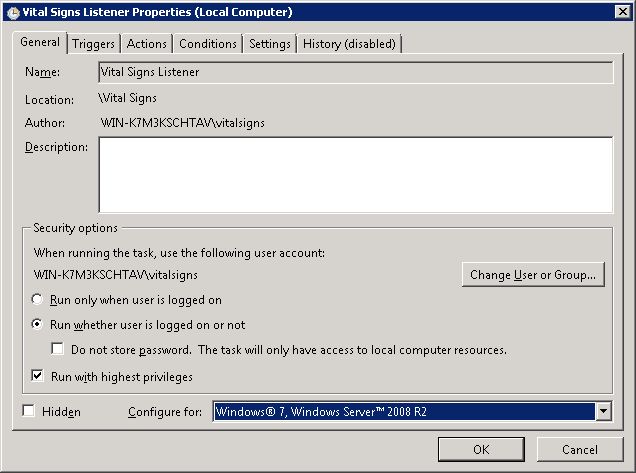
Click Run whether user is logged on or not, check Run with highest privileges and if you are running 2008 R2 select Windows 7, Windows Server 2008 R2 and click OK
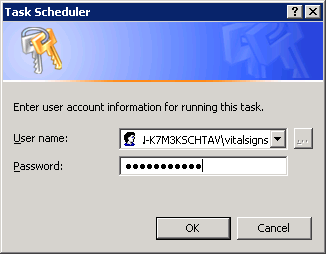
Enter the vitalsigns password and click OK
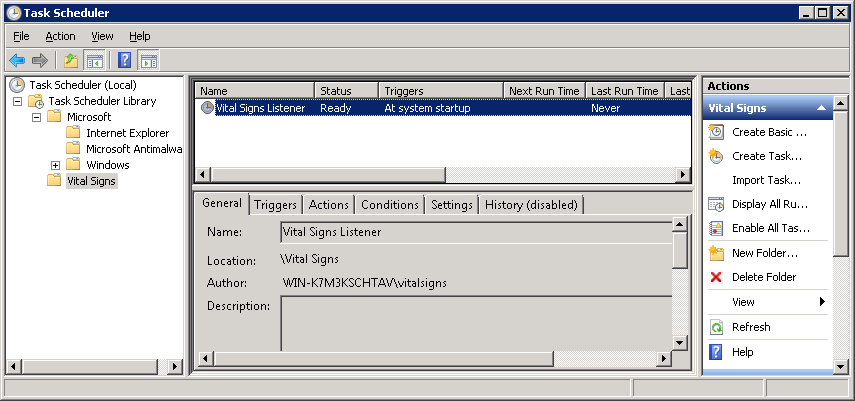
You should now see the Vital Signs Listener task with a status of Ready
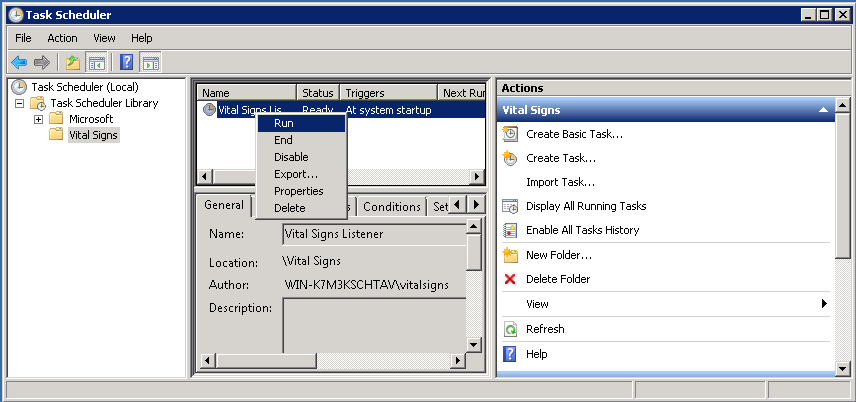
Right click the Task and click Run to start the listener in the background
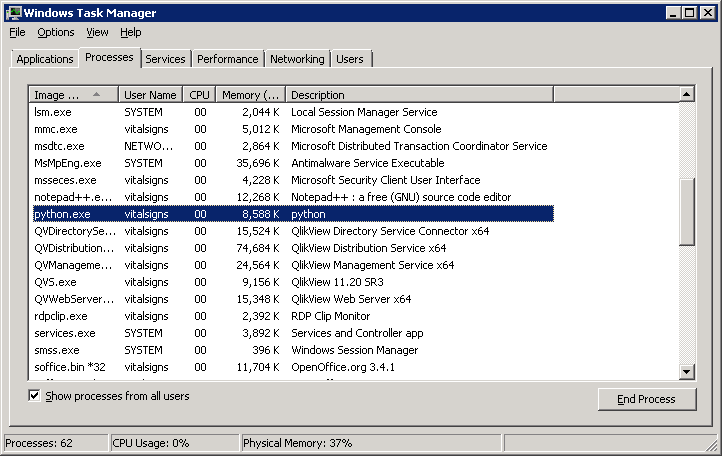
Verify the listener is running by opening Task Manager, select Processes, check Show processes from all users and look for python.exe
